


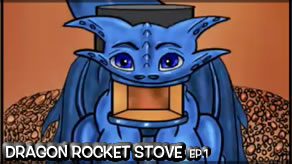
Dragon Rocket Stove
Episode 1
Plans and Placement
Artistic Dreams for our Mus-Art Rocket Mass Heater
This week we've been thinking about the past rocket stoves and how we will improve them for the Mus-Art studio! Watch the video to see what we've come up with! If you like the video, feel free to give that thumb up button a swift click!

http://mylittlehomestead.com/ep2-dragon-rocket-stove-foundation-firebox.html
Links
Our First Rocket Stove Mass Heater Bench
Shae aka Winter_Apple
October 7, 2016
Transcript of Video
Bree: We purchased the wood for the roof on the MusArt Studio. We will be bringing you updates on that next week. What are we doing this week? A unique rocket stove for the MusArt Studio. Let's check in on what Dad and Shae to see what they have in mind.
Shae: The next rocket stove on our list is going in to the studio's. We want it to be a little artsy considering that's going to be like the "home of art". We really want to do a dragon or lizard. This one that we are sitting on, really turned out well, but we want to keep improving it and make it better. So, tried new things, different things. With Garen's, I think works pretty well.
Garen: I love that it's sunk into the floor. That way I have a lot of room. I don't have to worry that big bench in this small of an area. It burns great, it heats great. Uses hardly any wood. It is a little low t the ground. It's not always easy to get down there and stoke it and start it. It starts nice, it's just you gotta bend down far. So, I do wish that it was a little higher. Other than that, it works, really really good.
Shae: we have a couple of issues, so, we made it even better for Bryson's. And I was...Bryson's works the best, so far. And it looks looks really good.
Bryson: I've been really satisfied with this rocket stove. It has worked really well. I mean, the only thing I would suggest is to add an air intake on the outside. Because just taking the air from inside and recycling it, isn't really that effective. Because, you start pulling air through the little creases in your house, like under the door. You start pulling the cold air in and pushing out your hot air. I look forward to using it this winter. I get to really use it. When it is actually snowing outside. I mean, the one time we get snow. Maybe. If we get snow. We sometimes don't get ant snore. And usually, it's just one day...yea...
Bree: I really like my little pot belly stove. But, it eats up a great deal of wood. So, I going to wait until they get the rocket stove like perfect. And then we are going to get one in here and like it is going to work awesome.
Shae: But, on this one, we got totally new ideas and we think it is going to turn out really really well.
Gary: This is the open flame area. This is the barrel, the rocket stove normally works in. Where we feed in will be the mouth. It will be a dragon and so on... And then, on a wall that's about eighteen incessant thick or more, behind this, heat storage will be on the wall as apposed to inside the bench. We are going to run the pipe from the rocket stove down here where the firebox is, inside the wall the stove pipe is going to go up in a zig-zags and then out the back. And we will store all the heat in the wall. The tail will go up the wall and it will kind of go this way up into the top. It will accruals decorate the wall that's going to store the heat.
Shae: Yea, I will probably be the one to paint it. I will probably help with design. I will defiantly hug the wall when we're done afterwards.
The weight of the stove does require that there is more support. I didn't want to build up the wood floor to support the wood stove. And we have a little corner of ground that's inside that is just big enough for this to fit. What's nice is the stairs end in one area and the bottom circle ends in one area. And the outside circle leaves us a little patch of ground to actually set the stove on. We are going to be putting the rocket stove right in between these two windows. It's going to require that it be five foot to the center. We need another foot for the piping that will be going out. It will actually be coming out abut three and half feet, which is right about here. So, we chose a spot that is right between these windows. It's about ten feet right between there. We are putting in a block foundation here so that we can set the rocket stove in the air just a little bit. This particular one has to have a wood floor that will come up right to it. We will have to prepare for that. What's nice too, is that when you open the double doors to go into the studio, there's going to be that rocket stove idea right there. The first thing that you see is when you open up is art.
Shae: so, It better be pretty.
Gary: it will be nice. It will be fun.
Shae: When we were laying the foundation, I helped move those very heavy bricks.
Gary: Why are the white ones heavier?
Shae: I feel like I had an easier time carrying them than you did with all the groaning and gripping you did.
Gary: Well, there're heavy. And you're stronger than I am.
Shae: Pure muscles.
Gary: Ya, pure muscles.
Shae: Balance them. Balance three bricks with one pinky.
Gary: Thank you.
Gary: We struggled finding fire brick in the area. I would drive along ways away. We did find it in a box store so we manages to pick that up. A buck and a quarter. I thought they would be a couple of bucks, maybe two or three bucks.
Bree: Stay tuned next week when we do the reciprocal roof. We will be bringing you updates on the rocket stove in between things. Thanks so much for watching and we will see you next week.
All: Thank you.
Shae: I remember when we were younger we wanted...we needed to get fire brick. There was an old house that was on our property that we torn down years ago. And where they had their fireplace, there was fire brick. So, us kids and mom like chiseling out the those blocks and we had enough to make our pizza oven. Didn't we?
Gary: we made a pizza oven.
Shae and Gary: The Pizza Oven!!
Shae: Our family moved from the city to the country. Thanks for taking art in our adventure.
Shae: We have new video's every Friday evening. If you would like to help us out, you can like this video, share it, subscribe or support us on Patreon. See the links in the description.
Bree: Bugs!! Let's check in on what Shae and Bryson or Dad. Let's check on what Shae and Dad are cooking up. And yes. That was unintentional pun. Cooking up...rocket stove. Sorry. Stay tuned next week, when we do the "rayceprical"..."raycepracal". Those are the two words I don't do. And this has both of the two no no's. " Reciprocal". Reciprocal. Awe... Yes. If only I can do that when we are actually recording. Be sure to stay tuned next week for that reciprocal roof.! Yes!! I said that right. Reciprocal.
Bryson's Rocket Stove
Garen's Earth Bag Interior with Rocket Stove

Our 1st Rocket Stove Mass Heater!

Partners
Resources
www.greenhomebuilding.com/adobe.htm
www.earthbagbuilding.com/articles.htm
www.earthbagplans.wordpress.com
We moved from the city to the country in 2005. Since then, we have been building structures, raising livestock and growing some of our own foods. We are crazy about family, nutrition and want the best for our growing family.
![]()